

How To Use OBS, Let’s start with the easy step by step guide.
Table of Contents
How to download OBS Studio
You can easily download OBS on Windows, Linux, MacOS. To Install OBS you shall visit their official website https://obsproject.com/ Once you visit the official website you shall select your platform: Windows, Linux or MacOS and than the download shall begin. After the download is finished, Open the file and begin the installation process. After installation you can open/run OBS studio. You can also find OBS Studio on Steam.
How to set up OBS Studio
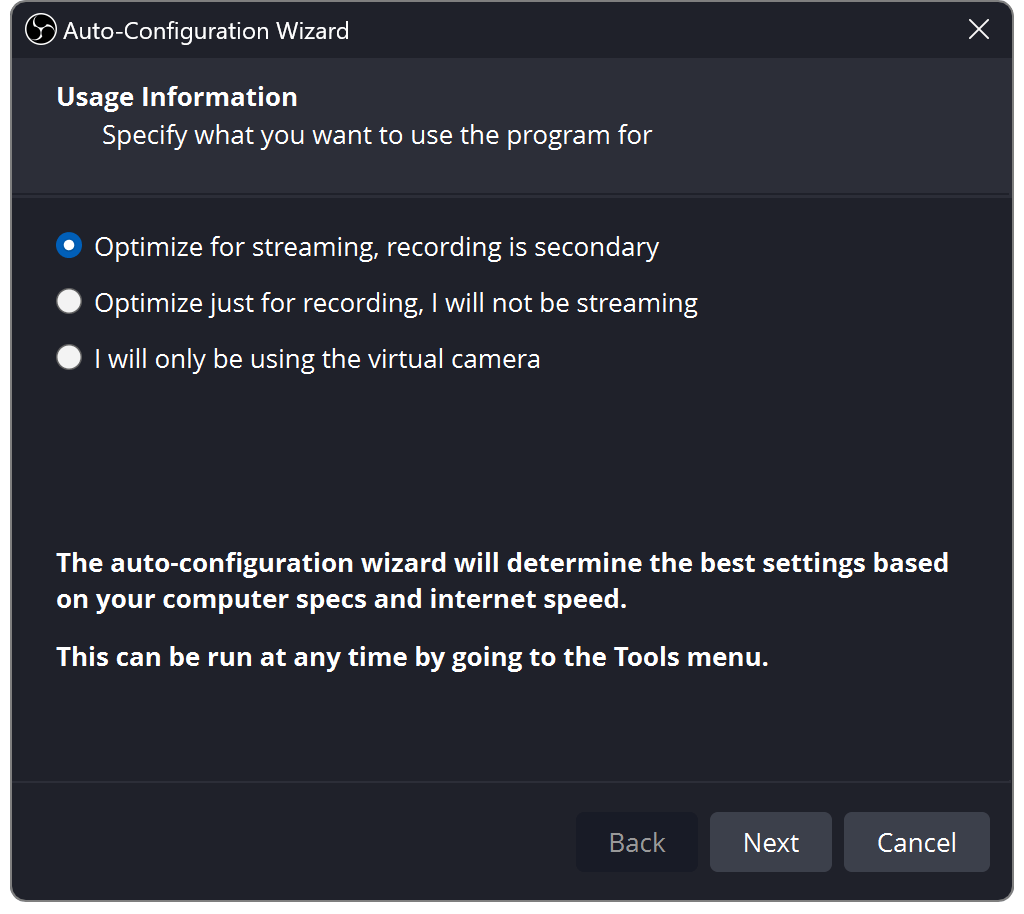
When you launch OBS Studio first time, you will come across the Auto-Configuration Wizard. This is a tool which is a automatic tool which tests your system/device and applies the most optimized settings specifically for your device. The Auto-Configuration Wizard is the best option if you want to start streaming or recording as quickly as possible. You can also access Auto-Configuration Wizard in the Tools menu in the top bar.
User Interface Overview
- Scenes:
- Scenes are collections of sources (like video captures, images, text, etc.). You can switch between scenes during a recording or stream.
- To add a scene, click the
+button under theScenesbox.
- Sources:
- Sources are the elements within a scene, such as your webcam, game capture, images, text, etc.
- To add a source, select a scene and click the
+button under theSourcesbox. Choose the type of source you want to add (e.g., Display Capture, Window Capture, Video Capture Device, etc.).
- Audio Mixer:
- The Audio Mixer displays the audio sources and their volume levels. You can adjust the volume or mute/unmute each source.
- Scene Transitions:
- This section allows you to set transitions between scenes. You can choose different transition effects and adjust their duration.
- Controls:
- Here you can start/stop streaming, start/stop recording, and access the settings.
Adding Sources In OBS Studio
- Display Capture:
- To capture your entire screen, click the
+button underSourcesand selectDisplay Capture. Name it and choose the display you want to capture.
- To capture your entire screen, click the
- Window Capture:
- To capture a specific window, click the
+button underSourcesand selectWindow Capture. Name it and choose the window you want to capture.
- To capture a specific window, click the
- Video Capture Device (Webcam):
- To add your webcam, click the
+button underSourcesand selectVideo Capture Device. Name it and choose your webcam from the list.
- To add your webcam, click the
- Game Capture:
- To capture a game, click the
+button underSourcesand selectGame Capture. Name it and choose the mode (e.g., capture any fullscreen application, capture a specific window, etc.).
- To capture a game, click the
- Image, Text, Browser Source:
- You can also add images, text, or browser sources using the corresponding options under
Sources.
- You can also add images, text, or browser sources using the corresponding options under
Configuring Audio
- Microphone:
- By default, OBS will use your system’s default microphone. You can change this in
Settings>Audio>Mic/Auxiliary Audio. - To add a specific microphone as a source, click the
+button underSourcesand selectAudio Input Capture.
- By default, OBS will use your system’s default microphone. You can change this in
- Desktop Audio:
- OBS captures desktop audio by default. You can configure this in
Settings>Audio>Desktop Audio.
- OBS captures desktop audio by default. You can configure this in
Streaming Setup
- Streaming Service:
- Go to
Settings>Stream. - Choose your streaming service (e.g., Twitch, YouTube, Facebook Live).
- Enter your stream key (you can find this on your streaming service’s dashboard).
- Go to
- Video Settings:
- Go to
Settings>Video. - Set your Base (Canvas) Resolution and Output (Scaled) Resolution.
- Choose your FPS (frames per second).
- Go to
- Output Settings:
- Go to
Settings>Output. - Set your streaming bit rate (this depends on your internet speed and the quality you want).
- Choose your encoder (usually, hardware encoding like NVENC or AMD is preferable if available).
- Go to
Recording Setup
- Output Settings:
- Go to
Settings>Output. - Select the
Recordingtab. - Choose the recording path, format, and quality.
- Go to
Starting and Stopping
- Start Streaming:
- Click
Start Streamingin theControlssection to begin your live stream.
- Click
- Start Recording:
- Click
Start Recordingin theControlssection to begin recording.
- Click
- Stop Streaming/Recording:
- Click
Stop StreamingorStop Recordingwhen you want to end your stream or recording.
- Click
Additional Tips
- Scene Collections:
- You can create different scene collections for different purposes (e.g., gaming, podcasting).
- Hotkeys:
- Set up hotkeys for various actions (switching scenes, starting/stopping recording, etc.) in
Settings>Hotkeys.
- Set up hotkeys for various actions (switching scenes, starting/stopping recording, etc.) in
- Plugins:
- Enhance OBS Studio’s functionality with plugins available from the OBS website or community forums.
How To Use OBS-Conclusion
It might be a little bit confusing but however if you follow these steps properly you shall learn How To Use OBS and you can enjoy making some content or whatever your use is. Have a amazing day everyone and also do read my other blogs at Solutions With LA.